Database Warranty Tag Workflow
Printer Friendly Version
The online Warranty Tag is here!
This great new feature allows Warranty Tags to be created in Order Entry accessing JEN.
What are the benefits to entering a Warranty Tag online?
- Easily accessed through JEN
- Central location to manage all tags
- Laser printed Warranty Tag
- Legible – no more trying to decipher someone else’s handwriting
This training document details the workflow for creating and searching for an Online Warranty Tag.
Warranty Activation
- Menu 35.1 Order Entry Parameter Maintenance, Screen 3 - Field 9 Online Warranty Tag must be set to ‘Y’ in order to activate the Online Warranty Tag through Order Entry.
Creating a Warranty Tag - Menu 1.2 – Order Entry
Step 1
- Enter Warranty part number with a quantity of –1 for return or 1r for replacement.

Step 2
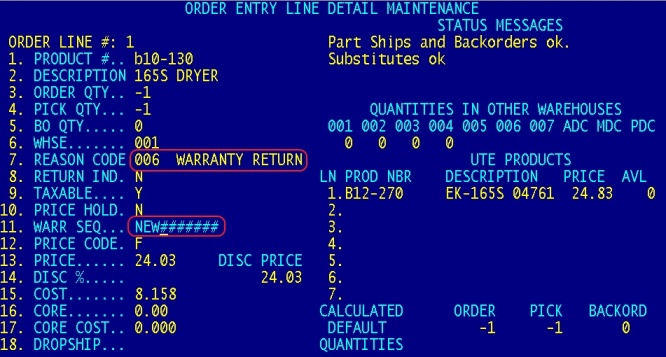
- On Field 7 of the Order Entry Line Detail Maintenance Screen enter a Reason Code of 006.
Step 3
- On Field 11 of the Order Entry Line Detail Maintenance Screen, enter the Warranty Sequence number of your choice or type NEW for an auto-generated number from the Database system. The system will then provide the option to type in the original invoice number. The Warranty Sequence number will carry over and appear on the top right-hand corner of the Warranty Tag. The Tag format is store number, W (for Warranty) and warranty sequence number (i.e. 155W123456).
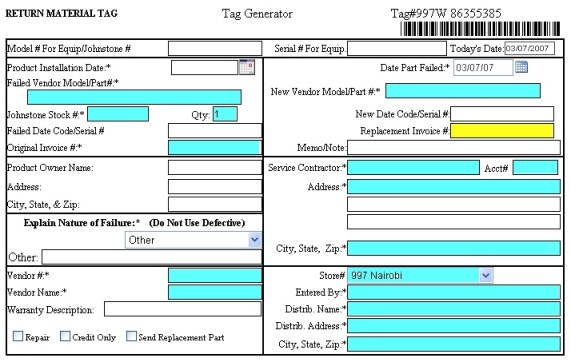
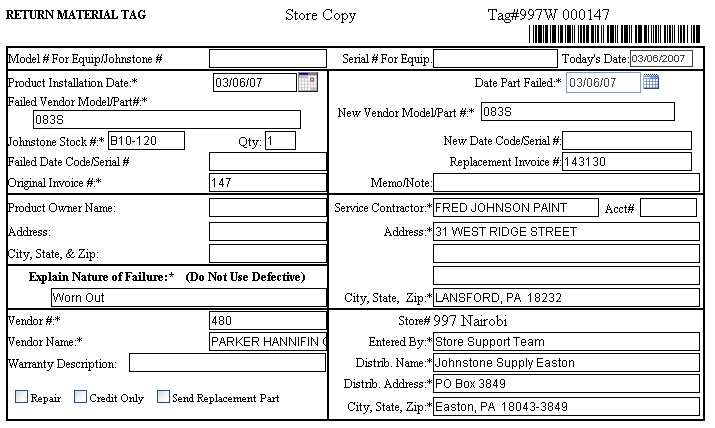
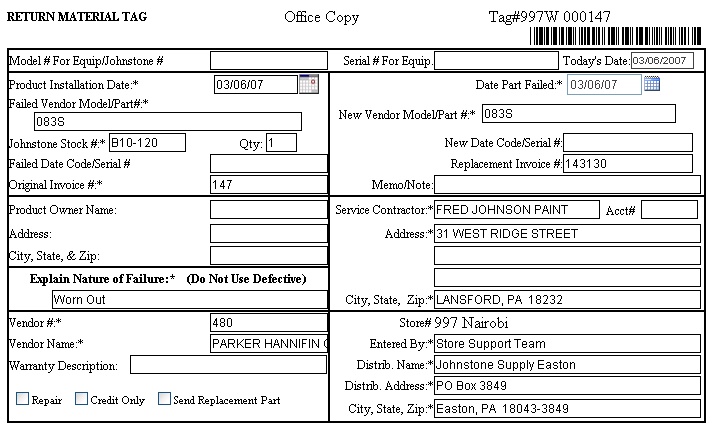
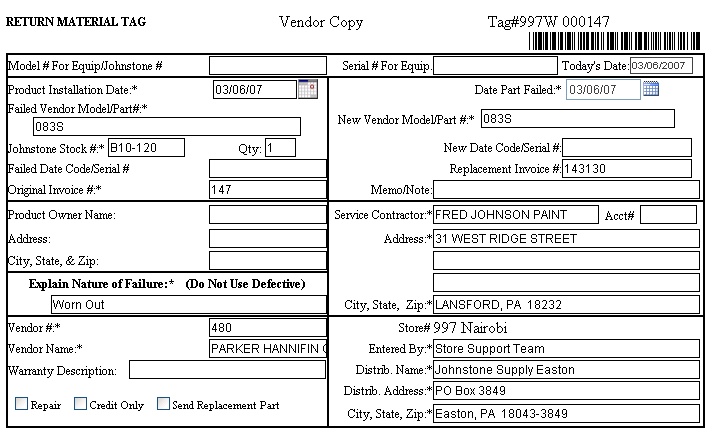
After entering the Warranty Sequence number or typing NEW the online Warranty Tag automatically appears. The fields highlighted in Blue will auto fill. The field highlighted in Yellow will auto fill after a new order is created. (See below)
Step 4
- Enter in the remaining required information, “Product Installation Date” and “Explain the Nature of Failure”.
Step 5
Step 6
· After Saving and Closing the Tag the system will return to the Order Entry screen to complete the order. The system will prompt you to print the Warranty Tag after the order is finalized.

Note: The prompt for printing the tag will appear after the order is invoiced
Searching for a Tag
Step 1
Step 2
- Search for a Warranty Tag that has already been created and saved.
Step 3
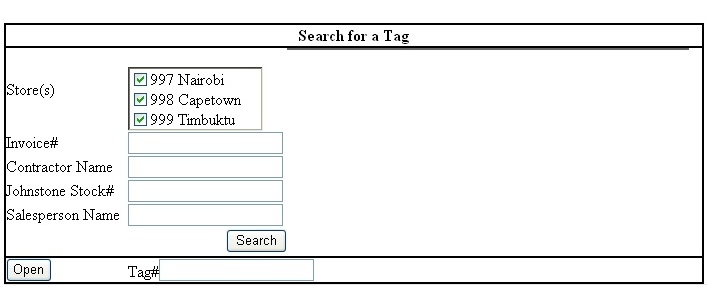
- Enter desired search criteria and click the Search button.
Search Options
- Store – Search by your specific store or all branch locations by checking the box(s)
- Invoice# - Search for an Invoice number that was entered in the Original Invoice field in the Tag Generator window.
- Contractor Name – Searches for a Service Contractor Name that was entered on Tag Generator window.
- Johnstone Stock# - Searches for a Johnstone Stock number that was entered on the Tag Generator window.
- Salesperson Name – Searches for a name in the Entered By field on the Tag Generator window.
- Tag# - If the tag number is known, enter in the number and click Open.
- Delete – Users with JEN Admin access will have the ability to DELETE tags. (This feature is under development and will be released by the end of March 2007)
Step 4
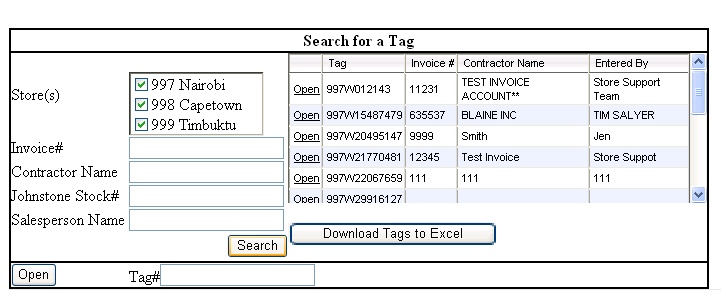
- Select the Open button of the desired tag.
Download Tags to Excel – This option will download the entire list of tags (including Invoice#, Contractor Name, Entered By, etc…) that appear after a Search, into an Excel spreadsheet.
Step 5
- After selecting Open in Step 4 the Warranty Tag will appear on the screen. Users have the option to print the tag again, Save, Close or create a new Tag.

- Print – Prints and Saves the Warranty Tag. The Warranty Tag will print if all required information is entered. Otherwise, an “Identification Only” tag will print if the required information is not entered.
- Save – Saves the Warranty Tag
- Save & Close – Saves the Warranty Tag and closes the Warranty Tag screen
- Close (No Save) – Closes the Warranty Tag screen without saving changes
- New Tag – Refreshes the screen and creates a new tag (often used after selecting the Save button)
Submitting the Warranty Tag to Corp
Procedures have not changed when submitting a Warranty Tag to Corp. Go to the Warranty Pages on JEN for vendor specific warranty return instructions.
Glossary
- Date Part Failed – The date the returned item failed.
- Distributor Address (city/state/zip) – The address of the Johnstone store submitting the Warranty Tag.
- Distributor Name – The name of the Johnstone store submitting the Warranty Tag.
- Entered By – The name of the person entering the Warranty Tag during the Order Entry process.
- Explain Nature of Failure – Select a Failure option from the dropdown list provided or enter in a specific reason in the Other field (Other field will print up to 45 characters)
- Failed Date Code/Serial# - Enter the date code/serial number that is on the warranty item.
- Failed Vendor Model/Part # - Enter the Vendor Model Number or Part Number of the item being returned
- Johnstone Stock Number – Enter in the Johnstone product number of the item being returned on Warranty.
- Memo/Note – Open field to enter desired information (will print up to 42 characters)
- New Date Code/Serial# - Enter in the date code/serial number if a new item is being issued.
- New Vendor Model/Part# - The Model/Part number of the item that the customer is taking in replacement for the failed part.
- Original Invoice Number – Original invoice number of the item being returned
- Product Installation Date – The date the product was installed
- Product Owner Name & Address – The name and address of the person/Company who purchased the returned item from your customer.
- QTY - Enter the quantity number of the item being returned.
- Replacement Invoice Number – The invoice number that was entered for the replacement part the customer is receiving.
- Service Contractor (address/city/state/zip) – Name and address of the customer returning the warranty item.
- Store # - The Johnstone store that is submitting the Warranty Tag.
- Tag Number – The tag number represents the store number, W for Warranty and an auto generated number from Corp system.
- Today’s Date – Auto populates with the date the tag is created.
- Unit Model # for Equip/Johnstone# – Enter Model number of the warranty item (optional to also add the Johnstone# as part of the model number).
- Unit Serial # for Equip - Enter Serial number of the warranty item.
- Vendor Name – Enter in the name of the Vendor that manufactures the item being returned.
- Vendor Number – Enter in the Vendor number that manufactures the item being returned.
- Warranty Description – Select Repair, Credit Only, or Send Replacement Part
|


