Next window is the location setup, select your time zone and tap next.
This Phase of the setup is now complete.
Configure the PPT 2846 settings
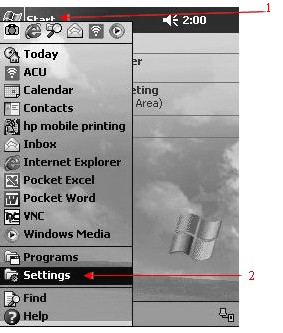
Tap the start icon1 then tap the settings icon2.
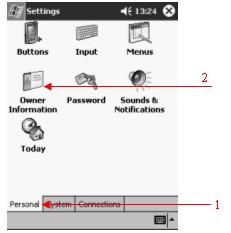
Under the Personal tab1, located at the bottom of the screen (should be on this tab already), click the Owner Information icon2.
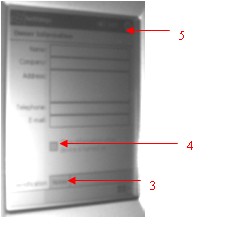
Fill out the information listed and check the box that says “Show information when device is turned on.”3 This information could be helpful if the device is lost. Also, you may want to fill out the notes4 tab (giving information on how to contact you,) if the unit is lost. Check the box that says “show information when device is turned on.” When you are finished, tap the OK5 button in the upper-right hand corner.
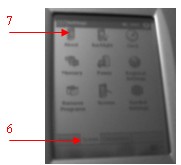
Under the system tab6, tap the about7 icon,
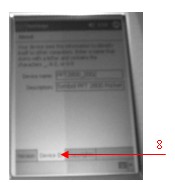
go to the Device ID Tab8. Change the device name. We recommend something like the first 3 letters of your city, then an underscore (_), then hh1 hh2 and so on. For example, 1st handheld device name is JAX_HH1, 2nd handheld device name is JAX_HH2. Each device has to have a different name. A duplicate name will cause a conflict on your network. It is not necessary to change the description, but you can if you would like. When you are finished, tap the OK button in the upper-right hand corner.
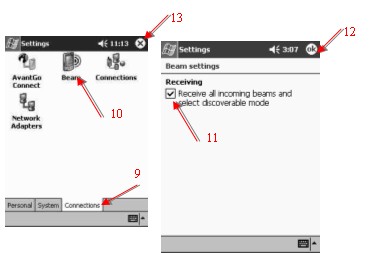
Under the Connections tab9, tap the Beam icon10 and uncheck receive all incoming beams and select discoverable mode11. When you are finished, tap OK12 in the upper-right hand corner, then tap the X13 in the upper-right hand corner.
Installing the Single port Cradle (CRD2x00-1000s)
Connecting to Power
The cradle provides power to the PPT 2846 terminal, and re-charges terminal batteries.
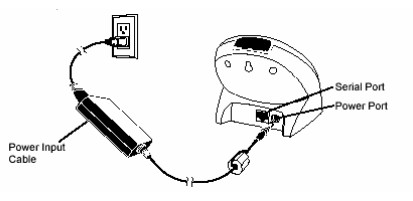
To connect the cradle to a power source:
1. Connect one end of the power input cable to the power port on the back of the cradle.
2. Connect the other end of the power input cable to a wall outlet, as shown below.
Inserting the Terminal
Insert the terminal as shown below. When inserted correctly. The bottom of the terminal fits smoothly into the cradle.
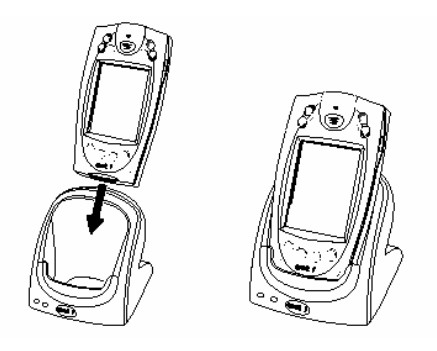
- The Terminal Status LED lights up (red, if battery is charging). If the battery is fully charged, the Status LED turns green.
- If the Terminal Status LED does not react, the cradle may not be receiving power, or the terminal may not be communicating with the cradle.
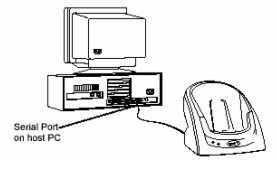
To use the cradle to provide serial communications between a terminal and a host PC:
1. Connect the cradle to a power supply.
2. Connect one end of a serial cable to the cradle Serial Port.
3. Connect the other end of the serial cable to the host PC.
Note: The cradle requires a dedicated serial port on the host PC. It cannot share a port with an internal modem or other device like a label printer.
Mapping Network Drive
You will only need to do this process once if installing more that one Terminal on your PC
• Close all programs currently running on your computer.
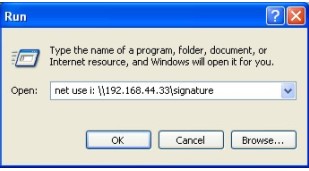
• Click START > RUN
• Type in - net use i: \\yourIPAddress\signature (Contact DST to obtain your IP address if you do not have it.)
• Click OK
Installing Microsoft Activesync 3.7.1
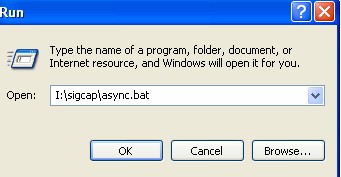
On your PC, click start, then run and type the following Command
I:\sigcap\async.bat, then click OK
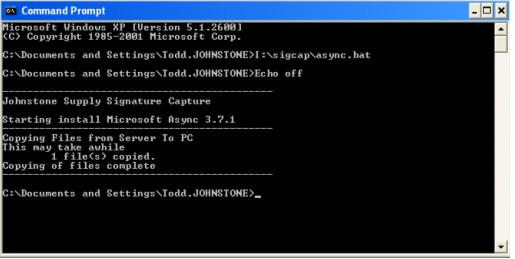
Example below:
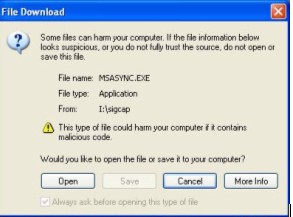
The next window below may come up, just click open.
The following screen below will pop up starting the install process for Microsoft Activesync.
At the Window that says set up Microsoft activesync 3.7, click Next.
At the Window that says Select Installation Folder, click Next.
This should complete the install process; the next screen that will come up will start the connection process.
The window that comes up is get connected, click the Next.
This will start looking for the mobile device.
Once it finds the mobile device, it will want to start a partnership.
Click the standard partnership button, then click Next.
Click the button synchronize with this desktop computer, then click Next.
On the next window (shown below) you will uncheck everything except Files.
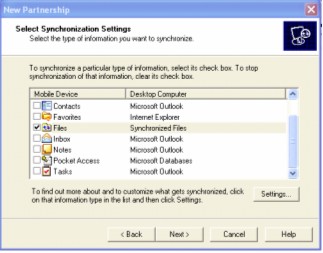
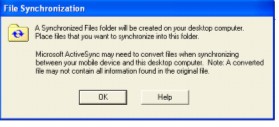
When you click on Files, a window will pop up about file synchronization (shown to the left), click OK.
On the next window, click Next, and the last window will tell you that setup is complete.
During the first Activesync with each Handheld, please follow the instructions below to ensure that there will not be any permission problems resulting in abnormal syncing behavior.
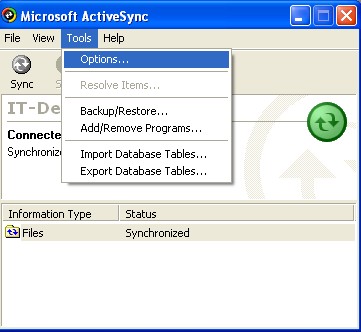
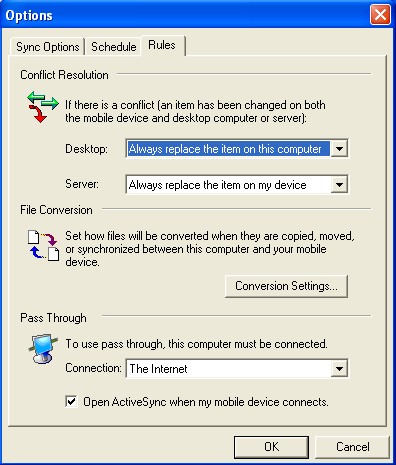
Click on Tools, Options, then Rules. Select “Always Replace Item on this Computer and Always Replace Item on my device.” Both of those options must be set for each and every individual handheld during the first sync.
Installing Signature capture software
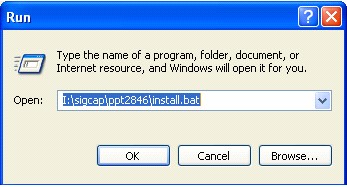
On your PC click START, RUN and type “I:\sigcap\ppt2846\install.bat” (without the quotation marks) and click OK, example below:
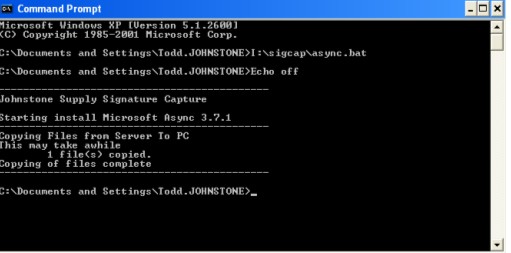
This will begin the install process by opening the DOS window which will copy the files to your PC.
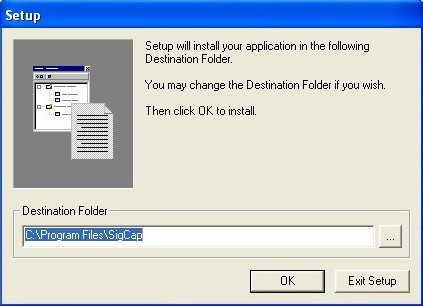
A setup window will open, accept the default destination folder and click OK.
You will briefly see the following DOS window appear on the screen.
When this window pops up, click ok.
This window will breifly pop up. It will automatically go away.

When you see this window, click yes, telling it to install using the default application install directory.

Now it will start installing the software on the handheld, this process could take awhile.Once the install process is complete on your PC, a window will pop up saying “Please check your mobile device to see if addantinal steps are necessary to complete this installation.” Click the OK button and tap anywhere on the screen on the Handheld.A window will come up on the handheld asking you if you would like to replace the existing file; tap the button that says “no to all Notes” this step is very important!Once you tap no to all, it will copy some files and the setup is complete.
Configuring the buttons to open signature capture
On the handheld, tap the start icon, then the settings icon. On the personal tab, tap the buttons icon1
This will make Signature Capture the program that opens up when you press that button4 on the handheld. Click the OK button at the top right hand side to close the window.
Active sync does not allow you to specify which directory to store the files for synchronization with the PC. In order to get the files to be stored in the proper directory, it is necessary to edit the windows registry on the PC. Note: If this is not done correctly, it may cause the PC to not function, so follow the instructions very carefully.
You will need to go into each folder and make the following changes, starting with the first folder and repeat the setup for the rest of the folders.
8: Click the plus sign (+) next to the folder name on the first folder in the list
9: Click on the + next to services
10: Click on the folder named synchronization, this should display information in the right hand window.
11. On the right hand side there is an entry called Briefcase Path, double click this value.
13. Click the ok button.
14 repeat steps 8 thru 13 on the rest of the folders listed under Partners.


